The 10 Most Scariest Things About Door Repairing
페이지 정보
작성자 Fredericka 작성일 25-08-20 21:32 조회 2 댓글 0본문
The Comprehensive Guide to Door Repairing: Techniques, Tools, and Tips
Door repair is an essential skill that every homeowner or property manager ought to master. Doors function as the very first line of defense against external components, yet they are often taken for granted up until an issue develops. Whether it's squeaking hinges, a misaligned frame, or a lock that will not engage, understanding door repair can save money and time. In this post, we will check out typical door problems, tools needed for repairs, detailed procedures, and often asked concerns relating to door repair.
Common Door Repair Issues
Before delving into the repair strategies, it's vital to recognize the normal problems that homeowners might come across with doors. Here's a list of the most typical issues:
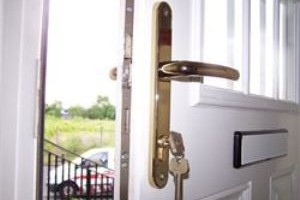
- Squeaky Hinges
- Misaligned Doors
- Sticking or Binding Doors
- Broken Locks or Handles
- Damaged Door Frames
- Peeling or Damaged Paint
Table 1: Common Door Issues and Their Symptoms
| Problem | Symptoms | Potential Causes |
|---|---|---|
| Squeaky Hinges | Sound when opening/closing | Absence of lubrication, use |
| Misaligned Doors | Gaps on top or bottom | Settling structure, loose hardware |
| Sticking or Binding Doors | Trouble in opening/closing | Humidity, warped wood |
| Broken Locks or Handles | Trouble locking/unlocking | Damaged mechanism, rust |
| Harmed Door Frames | Noticeable fractures or dents | Effect damage, weather condition exposure |
| Peeling or Damaged Paint | Chipping or flaking | Age, wetness damage |
Tools Required for Door Repair
Having the right tools is important for effective door repair processes. Below is a thorough list of tools every DIY enthusiast must have:
- Screwdriver Set-- Both flat-head and Phillips.
- Hammer-- For mild persuasion of door frames and hardware.
- Pliers-- To grip and twist any stubborn screws or pins.
- Allen Wrench Set-- For any furniture hinges or locks that need particular hex secrets.
- Lube-- Such as WD-40 for squeaky hinges.
- Wood Glue-- For small repairs in the door frame.
- Sandpaper-- For raveling rough edges or surface areas.
- Painting Supplies-- For refinishing excessively cracked doors or frames.
- Level-- To ensure positioning during repairs.
Table 2: Tools for Door Repair and Their Uses
| Tool | Usage |
|---|---|
| Screwdriver Set | Tightening up or getting rid of screws |
| Hammer | Adjusting and fitting parts |
| Pliers | Manipulating small parts |
| Allen Wrench Set | Tightening hex screws |
| Lube | Decreasing friction on hinges |
| Wood Glue | Repairing harmed areas |
| Sandpaper | Smoothing surface areas |
| Painting Supplies | Retouching or totally refinishing |
| Level | Inspecting positioning of doors |
Step-by-Step Guide to Common Door Repairs
1. Repairing Squeaky Hinges
A squeaky door hinge can be irritating however is relatively basic to deal with.
Steps:
- Apply a few drops of lubricant on the hinge.
- Open and close the door a few times to work in the lube.
- Rub out any excess lubricant with a fabric.
2. Realigning Misaligned Doors
If a door does not close properly, it might be misaligned.
Actions:
- Use a level to inspect the alignment.
- If misaligned, loosen up the screws on the hinges a little.
- Change the position of the door.
- Retighten the screws and check positioning once again.
3. Fixing Sticking or Binding Doors
Humidity can trigger wood doors to expand and stick.
Actions:
- Identify the sticking point by closing the door slowly.
- Mark the area where it binds with a pencil.
- Gently sand down the area until the door opens smoothly.
- Repaint or seal if essential.
4. Repairing Broken Locks
Broken locks can compromise security.
Actions:
- Remove the lock from the door using a screwdriver.
- Examine for broken components; replace if necessary.
- Reinstall the lock and ensure it engages correctly.
5. Fixing Damaged Door Frames
A damaged door frame can lead to bigger problems.
Actions:
- Assess the damage; for minor cracks, use wood glue to fill.
- Use secures to hold the area till it dries.
- Spot with wood filler if required and sand smooth.
6. Refinishing Peeling Paint
Aesthetics matter, too.
Steps:
- Remove any loose paint with a scraper.
- Sand the area smooth.
- Tidy the surface area window and Door upgrade apply new paint or stain.
Frequently Asked Questions (FAQs)
Q1: How do I understand if I need to change my door instead of repairing it?
A1: If the door is warped, thoroughly split, or harmed beyond repair, it might be more affordable to replace it.
Q2: Can I fix a door myself, or should I work with a professional?
A2: Many typical door issues can be resolved as DIY tasks. However, if you're uncomfortable with repairs or the damage is comprehensive, hiring an expert is suggested.
Q3: What are the finest lubricants for door hinges?
A3: WD-40, silicone spray, and graphite powder are excellent lubes for door hinges.
Q4: How can I prevent my doors from sticking in the future?
A4: Ensure proper ventilation and keep a consistent indoor humidity level. Regularly examine hinges and locks for wear and lube them.
Q5: Is it necessary to repaint or stain my door after repairs?
A5: While not always needed, refinishing your door after repairs can boost visual appeals and protect the wood from moisture and other components.
Both aesthetic appeal and functional integrity are paramount for doors in any home. Regular maintenance and timely repairs can cause a longer life-span for your doors. By comprehending common problems and possessing basic repair abilities, house owners can believe in their ability to maintain their residential or commercial property successfully.
- 이전글 9 Things Your Parents Teach You About French Doors With Windows
- 다음글 Guide To Big Sale On Sofas: The Intermediate Guide Towards Big Sale On Sofas
댓글목록 0
등록된 댓글이 없습니다.